Wednesday, December 14, 2011

Insomnia leads to...a new sewing center

So it turns out that one of the "joys" (a term used rather loosely here) of my experience with menopause is insomnia.

You know what I mean - the tossing, the turning...and that's just Dave trying to get back to sleep after one of my hot flashes. For me insomnia is dreadful because it means some days I muddle through in a cloud of exhaustion and crabbiness...one of the walking wounded of middle age.

And yet...with more waking hours on my hands, I have a lot more time for projects (assuming I am rested enough to use my power tools). 

For those of you who are now worried about my safety, rest assured, Dave has established some house rules that I follow religiously:

1. Always wear my safety glasses
2. Always alert someone capable of calling 911 prior to using my table saw


Even after a decade of use, the table saw scares me...but I love what it can do!
But I digress (no surprise as it's 3 AM as I type this). I met my girlfriend Jerry last year on the "trail" (off-roading) and found that we had lots in common (home renovation...sewing...and more home renovation) so a month ago she asked if I would be interested in adopting some of her sewing cabinets.

It seems Jerry is too tall for the munchkin-sized built-in sewing center that came with her new house. Imagine an entire wall of compact custom-crafted oak cabinets (including a sewing lift and an ironing board drawer) lining a guest room wall. Lucky me as I just so happen to be a member of the Lollipop Guild!

After wiping the drool off my chin, I said I was very interested...I just didn't know where I could install the cabinets. Now my house is half the size of Jerry's and if I installed the cabinets in our teeny guest room, guests would have to sleep on the pull-out ironing board.

I toyed with a few other ideas - building a room in the garage (nixed by the man of the house); enclosing the back patio (nixed by the dogs of the house) and finally had the revelation that the solution lay less in location and more in locomotion - I didn't a permanent spot for my sewing center...I needed WHEELS!

Luckily for me, Jerry knows every building supplier in our town and was happy to take me to a local source of high quality wheels (I still have a longing for the 4 1/2" blue ones but they made the cabinets too tall for little old me).

I picked the no-mark, smooth gliding ones...with the locking wheel feature of course.
From the original 9 cabinet pieces I decided to create 3 discrete units:

1. a desk-like unit to house the sewing machine lift (sooo cool) and two sets of drawers;

2. a dresser-like unit to house the super cool ironing board drawer and various quilting supplies;

3. a console-table-like unit to store books

I took this pic to help decide which leg suited the scale of the console unit.
Things went pretty smoothly at first, but there are real dangers in operating with a lack of sleep...

Case in point:

Friday, I noticed a great deal of wasted space under the ironing board drawer and determined that an additional shelf would be ideal...all I needed was some MDF board the right size.

I glanced around my lumber-strewn garage and my gaze landed on the perfect piece.

Following protocol, I alerted my 911-safety call buddy (Dave) and fired up the table saw. Zip, zip and the shelf fit perfectly! I admired my handiwork and almost tweaked my shoulder patting myself on the back for my ingenuity...that is until I went looking for the piece of MDF I had so carefully cut, measured and put to one side to use as the countertop...sigh***.

***In all honesty - I didn't "sigh" the moment I figured out I'd just chopped up the top - I used many of the words in my extensive 4-letter vocabulary.

So I needed more MDF - which only comes in 4' x 8' sheets...

Did I mention that they know me by name at Lowe's?

I'm there a lot.

Did you know they open at 6 AM?

I know because it's 3:45 AM now and they won't be open for another 2 hours and 15 minutes.

I wonder if I should just ask for a key?

Anyway, the construction of all three pieces was progressing but I was still unhappy about a minor aesthetic problem I was having with the "1980's tract home kitchen" medium oak stain color.

I hate it.

But re-staining means...gulp...sanding...every little nook and cranny...ugh.

The original 1980's stain is on the right - the new look is on the left side doors.
So Saturday, after the early morning Lowe's staff meeting (I wasn't actually invited to the meeting but they welcomed me into their midst), Sherrie (my paint counter connection at Lowe's) shared that Rustoleum has a new cabinet re-finishing system sold in a kit that would solve my problem WITHOUT sanding. Of course the $78 was not really in my budget for this project (official budget was $0 but is cresting at $350 as of this writing) but did I hear, "NO SANDING"?

So this is how the 4-step system works:

1. Degloss the surfaces with a scrubby and their deglosser (kind of like washing so fairly easy to do and fast)

2. Paint the cabinets with a "bonding" paint that really looks like a cross between pale yellow and flesh - 2 coats (also easy).

3. Brush on the stain and wipe off - you have 5 minutes until wiping becomes impossible (sounds easy enough but oddly panic-inducing)
Step 2 painting results on the left, the stain coat makes the upright dark brown but wiping it off reveals all the natural beauty of the oak grain. I still don't know how it does that because the paint seems opaque and obscured the grain almost entirely. It must be magic.
4. Top with a clear coat (easy).

I LOVE this product! The results are amazing.

But I love my sewing center more - especially all the cool features:

The ruler holder:

Got to use my dado blade on the table saw to make that!
The ironing board drawer:

I need to sew it a new cover but how cool will it be to iron while seated?
Jerry and I went shopping for some pretty organizational boxes which it turns out I have a weakness for that some might term an addiction...
I also shopped for a few desk top accessories...here's how it all turned out:


I've already stored all my cookbooks and quilting books inside.

That rounded box holds my iron and the jar holds my seam pressing tools. I couldn't resist the ballroom dancing sillouete.

It took me hours to get the height and opening right for my sewing extension table as it's larger than the sewing lift cabinet but it turned out better than I expected. The boys love a blanket in their comfy chair - not sure they'll stick around when the sewing machine starts up though.
I'm ready to sew! Right after I take a nap...

Friday, November 18, 2011

Chicken Fried Quilting

What do you get when you cross the Canadian backwoods with fourteen quilters and a few bottles of wine?


Rubber chicken legs hanging out of the corner of your mouth!

This is May with...yep...a rubber chicken leg hanging out of the corner of her mouth!
Let me back up a minute to explain...


My sister loves to quilt and has been attending a quilting retreat up in Canada for the past several years. Each year she returned home with tales of high adventure, hilarity and large amounts of quilting. I knew I wanted to be part of the fun.

I mean what could be better? Making quilts like this:

Caroline and her pretty pinwheel quilt.

Or this?

Caroline, our roommate Cheryle, and me leaning on the king size sister quilt Caroline and I made together.

You can even wear them as you make them if you want!
Caroline in her hula quilt skirt.

So this year, I wheedled my way in the trip (much like I did when we were kids no doubt).


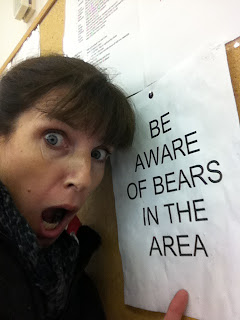
Imagine a girl scout camp tucked away in the forest with nothing to worry about except thread snarls...or..


Very welcoming sign posting don't you think???


Well we didn't see any bears...but we did see a fair amount of rain which made for some snugly quilting weather.


The quilters themselves were full of Canadian fun and frolic - an obvious side effect of:

1. Loads of tasty food (we were fed approximately every 3 hours much like hobbits prefer);
2. Wine; and
3. Full permission to stay in our jammies all day (okay I may have been the only one to actually do that).


There was just one odd addition to our band of merry quilters...a rubber chicken.
This was my first rubber chicken encounter.
"Ms. Wild Woman Chicken" first appeared on my sewing machine when I foolishly stepped away to have another cup of tea and some treats. At first I didn't know what to think (it's hard to think when tea is coming out your nose from laughing too hard) but then it all started to come clear...


It seems the tradition with these crazy quilters is that the rubber chicken must be secretly placed when the victim quilter is otherwise distracted. They also told me it was expected that you add something to the chicken...at least I thought that's what they said.


So I added a batman mask (to protect Ms. Wild Woman Chicken's identity) and placed her discreetly on another sewing machine. Other additions included: bloomers, bra, bonnet and even a nose piercing! (The vet in our group used her hemostats to turn a quilting pin into something resembling a bull's nose ring).

The jelly bean necklace is all the rage on the runway this year I've heard.


The laughter rang loud and long over this "Chicken Run". We even managed to get some quilting done...

That's me in my jammies...at 3 in the afternoon...


All went well until the last lunch on Sunday...and then I saw the featured sandwich:


Monica - shop-owner, retreat sponsor, and chef.


I was sad to leave the retreat - what a fun group of women with terrific sense of humor! I'll never forget Ms. Wild Woman Chicken either...

I can't.


Really...


Because when I went to pack my luggage for the flight home, guess who stowed away in my bag?

Yup - Ms. WWC herself. I didn't think she'd make it through the TSA security check but with her own ticket and Canadian passport she sailed right through.


She was a good traveling companion and really seemed to enjoy the flight.
No telling what the other passengers thought of my traveling companion...

Friday, October 14, 2011

Learning to Tattoo

So I was cruising the stacks at my local library (and found myself in the craft section of course) where a book title jumped out at me.

Zen Tangle

I just loved the opposition suggested by those words...

"Zen" implying a smooth sort of flowing ease (which I would love to achieve) and "Tangle" implying utter 4 year-old chaos (hair, shoelaces, etc. which I have achieved on any number of occasions).

Turns out the concept is a catchy term for doodling...primarily with black ink.


Think of it as a sort of tattoo for inanimate objects (minus the pain, butterflies, declarations of love for mom, country or some barmaid named Bernice).
I decided my old bamboo lazy-Susan would be my first victim...er...project.

First I painted a base coat of flesh color to simulate actual skin...
Okay, not really - I only had three jars of craft paint handy - flesh, red, and brown and since flesh was the lightest...it won the draw for base coat...still I had you going on the whole tattoo theme didn't I? 

Then I added in the red and brown.
Side note - Dave hated it at this stage - he said it looked "blotchy".
Explaining "zen", "tangle" or even "shading" required far too much effort so I stuck my tongue out at him instead.
I will tell YOU, however, the idea is to divide up a large space into smaller spaces and then start "tangling" with a Sharpie. It is hugely time consuming and yet totally fun.
I kept coming back to it over a few days - each time picking a new area and then tangling up a new design.
It's officially ZEN-TANGLED!

Monday, October 3, 2011

The Making of an Alex Quilt...

I made my son Alex his first quilt when he was four years old. It was a simple pattern (which was all I could manage) featuring oddly leaning pine trees on a cream background. He loved it (small children have low standards) but decades of washing have reduced it to a mere shredded ghost of its previous misaligned glory.

So last month, after several minutes of protesting, Alex finally agreed to let the pine tree quilt go to that special quilt shop in the sky...after exacting my promise to replace it with a new one.

But there were rules:

Rule #1: No flowered fabrics could be used (that rule narrows the choices at any given quilt shop by 85%).

Rule #2: Earth tones were required (that 15% just narrowed to 5%).

Rule #3: The backing had to be soft but not overly warm so the quilt could be used in summer (I searched high and low for brushed cotton - and had to settle for a light flannel).

Soft and the swirly lines hide any quilting whoopsies...
I was up for the challenge having just signed up for a "Rhinestone Cowboy" quilt class at the local quilt shop.

So I sent Alex a snapshot of the quilt pattern made up into a lap quilt at the store...

My quilting teacher made this lap quilt for her cowboy themed TV room.
And he responded with...

Rule #4: "No cowboy themed fabrics either" (So I was down to 3% of the available fabrics assuming I excluded Christmas prints).


Pretty much I bought a "fat quarter" of every fabric they had that met Alex's criteria.

I was super excited to take the class.

I would have the chance to learn new things, meet new friends and use my new sewing machine...

Of course the night before class my excitement turned into back-to-school jitters. I was a bundle of nerves - Would they like me? Would I make a complete fool of myself since I barely knew how my new machine worked? Would there be snacks?

Luckily for me there were only two other students (and they had met a few weeks before at a beginning quilters class so they were friendly and understanding). The teacher was very knowledgeable and patient.

And best of all - they had COOKIES!

I had cut all my squares at home so was ready to start sewing in class.
We started by sewing the main blocks together which doesn't sound like a big deal but you have to try and get all the corners to line up...which is a big deal because it's hugely hard for me.

Quilters call this "nesting seams" because they aren't supposed to use the real words which are more like, "#%&*ing seams".

These are my first two blocks...with the "nested seams" and they only took 4 hours to sew.
By the time I had sewn all the blocks together - (a week later at home after tremendous profanity and few adult beverages) I no longer called it a "Rhinestone Cowboy" quilt - it became the "Nesting Nightmare" pattern.

Since Alex wanted a double bed sized quilt I had to use the floor as my design wall.
Of course I had some help with the layout...

Huckleberry loves Alex's new quilt...
But not as much as Golly does!
Actually I did have a lot of help with this quilt in the form of long-distance phone support from my sister Caroline who is a math/science teacher and expert quilter (she's super good at calculation and all the geometry quilts require). With her advice I was able to put my new sewing machine and its fancy stitches to good use.
I love these embroidered corners!

And I thought the wave pattern looked pretty cool too.
After the quilt top was assembled, I had to "slapplique" the stars on top. The idea is to "slap" them down without sewing the edges under. This allows their raw edges to become ragged in the wash and gives a rustic texture to the quilt top.

The stars were my favorite part of the pattern!
A month later I'd sewn all the "stars upon thars" and was nearing the home stretch. Of course, that was after a LOT of unpicking or "reverse sewing" as quilters say (they're just full of cute sayings) during this project.

In fact, I had to "re-sew" the entire binding by hand...with some help from Golly as usual. 

Golly just LOVES Alex's quilt...me? Not so much...at least not until my bruised fingers heal up.

The real question of course is, "Will Alex like it?"

He likes it!!!


Tuesday, September 13, 2011

Odds and ... More Odds Actually

Lately I have been getting some minor heat about not posting more often. 

"Surely, you're doing more than working on your tan mum?" was the gist of the complaint.

In my defense, summer in the desert is more about going to the lake than projects (tanning is a natural by-product of lake fun - even wearing 50+ SPF).

But you know me - I can't resist a small project here and there. I hadn't posted them because..well...they're odd projects.

Tell you what - I'll let you be the judge.

Here's a few of my odd little projects (you can decide if the emphasis should be on "odd" or "little" - cast your votes wisely).

Project #1 New Wallet Pen Holder

My niece and her husband came to visit for a week and on our way back from the Grand Canyon (#1 desert attraction) we stopped for dinner.
Aren't they cute? It's their 7th anniversary.

The restaurant had a small attached gift shop and I found a lovely wallet.

I love that color and it matches my car!

It was perfect - except it didn't have a pen holder.

I tried just wedging a pen in there for a few days but every time I opened my wallet the pen would fly out leaving me scrambling on the floor at the checkout...some people get mad when you take too long to pay at Walmart :(.

I'm lost without a pen so...some elastic and a few stitches later...success!

Nice and neat - I should be a wallet designer...

Project #2 Reattached Elastic on Seat Cover

Desert heat is destructive.

I don't just mean paint fading and candles left in the garage melting - EVERYTHING disintegrates.

Check out the candle on the far right - how crazy is that? Our garage gets between 100-110 degrees F.

Mostly things dry out and then collapse. For instance the elastic that holds my car seat covers in place literally transformed itself into hundreds of little white balls...at first I thought it was "snowing" in my backseat. Once I figured out what was going on I replaced it with fresh elastic.

The before picture of my first repair job.

Unfortunately I did a crap job on the part where my left arm touches the sheepskin. It had been driving me crazy for a couple of weeks because every time I got in the car it scratched my arm. It just needed folding under and a few whip stitches.


Why did it take me weeks of arm scratches to fix this annoyance???
Remember I warned you that these were odd projects...

Project #3: Replacing the Non-Skid Daisies

We are lucky enough to have a large walk-in shower. I love it...well mostly. It seems that the previous owner (probably an ex-ice skating champion) decided to tile the shower floor with the slickest tile known to man!

Seriously - these suckers could help with the space shuttle's re-entry drag issues.

Anyway, after a few falls (I'm guessing) the previous owner packed up her crutches and went to Walmart to buy non-skid daisies. Not exactly a design statement (at least not one I'd like to make) but they do the trick. Except when they are brittle and peeling up that is.


So I scraped them up. Then I scraped up all the adhesive. Then I used Goof Off on the residue. Then I realized that my 10 minute project had become a 2 hour project!

This may be one of my favorite inventions of all time.

Finally the daisies were gone. I tried the tile. Maybe they weren't so slick now that I'd cleaned them so well...

One step. One slide. And one screech later I was back at Walmart in search of more non-skid daisies. Luckily, times have changed and modern design has found its way into the non-skid market.

Yep - they carry non-skid 1960's era Mod Squares. I kind of like them.

Makes me feel like "That Girl" when I shower.

Project #4 Sewing Machine Cover

As you know from my last blog - I had to make an early morning run to Walmart and buy a new sewing machine to finish my last couch project. I really like the new machine but I hate the cardboard box it came in. Sure I could buy a generic plastic case for it ($29) but I really just need a dust cover for it...

So I started rooting around my fabric cache and happened across that Trapunto quilt block from a class I took last year. Originally I had visions of a beautiful tone on tone quilt that would be handed down through the generations. (I can hear you laughing you know).

Reality has squashed that vision like Lucille Ball tromping on a thin-skinned grape.

I really liked the idea that my one completed square would finally serve some use so I whipped it up into a quilted dust cover.
It was roughly the right size already thankfully.

Unfortunately, it meant that I had to quilt the other pieces as well or the weight of the Trapunto piece would pull everything out of alignment. I'm not exactly sure why this mattered to me but it turned a 30 minute project into a whole morning of quilting.

Then I had to add a pocket for the extended table, foot pedal and manual of course.
All that's left to do is bind the edges...
Not exactly "heirloom" but kind of functional in an artsy sort of way - don't you think?

Do you see now why I haven't been posting??? My life is filled with these itsy-bitsy projects. Now cast your votes - I'm headed back to the lake!