At least that's what this mouse did when Dave was out of town last week. He was supposed to be gone for 2 1/2 days which I figured would be just enough time to do the super-disruptive, messy and destructive part of my minor kitchen renovation.
In case you didn't know - Dave hates remodeling.
That does not stop me.
But it does inspire me to try and get the worst bits done when he isn't around to complain...I mean, "be bothered" by it.
Sure he knew that I planned to replace the granite tile top on our kitchen island with a butcher block top. I'm not that secretive about my remodeling ideas. But I have learned to discuss such matters with him in a special high-pitched voice that only dogs can hear...either that or tell him while he's flying some helicopter on the computer. Both work.
Presented in either format, my ideas are usually met with, "Whatever you want; don't talk to me; I'm @%$^^!" Which I translate as, "What a great idea, honey!"
After 15 years of marriage, you learn how to read your spouse.
Now you have to understand that our kitchen island was not exactly a high end item. In fact, it was just a 48" stock cabinet with a cheap granite tile top. The tile was visually attractive (mostly) but could suck the heat out of breakfast omelet in seconds.
 |
| Originally I'd thought to stain the island to match the dark wood of the stools...except my staining skills suck as you can see - Jacqueline, where are you when I need you??? |
An expanded island would mean a view of the lake and wasn't that view why we'd bought the house in the first place?
And Dave left on his road trip.
It had been a busy day of grading online essays and lesson plan proposals so I couldn't dig in to the island destruction right away - work before play right?
By the time I finished grading (I am teaching some wordy folks this time through) it was 8 PM and the wind was howling. A cold front was bringing winds of 50 mph and some freezing temperatures. But the howling wind meant the neighbors wouldn't hear the sledge hammer blows.
I tucked the dogs into bed, donned my safety glasses (since there was no one on hand to drive me to the emergency room should I get something in my eye and began swinging.
The edge trim all but fell away so I was feeling pretty good about how quickly this would go. Then I encountered the solid rock formation of plywood, glasscrete, a thick layer of thin set (somewhat ironic I know) and granite tile. I was stymied at first when my blows would only yield splinters of granite.
Then I used a tile chisel...and my wonder bar. In just under two hours I was able to pry up the entire top. That's when I discovered that whoever had constructed the island top original had a fondness for drywall screws because he or she used enough of them to cause a shortage at Home Depot.
 |
| They are supposed to attach the plywood from underneath so it's easy to remove - somebody didn't read the manual damn it! |
 |
| I added cross-braces to the top to help support the weakly-jointed butcherblock top. |
 |
| I also built in a cubby to house all the various newspapers and magazines that always seem to end up on any flat surface. |
 |
| Of course I had to degrease, lightly sand, then prime ALL surfaces first...arrgh! |
 |
| And black is the worst color to paint because after the first coat, you can't quite tell where the thin spots are because they look just like glare...3 coats required. |
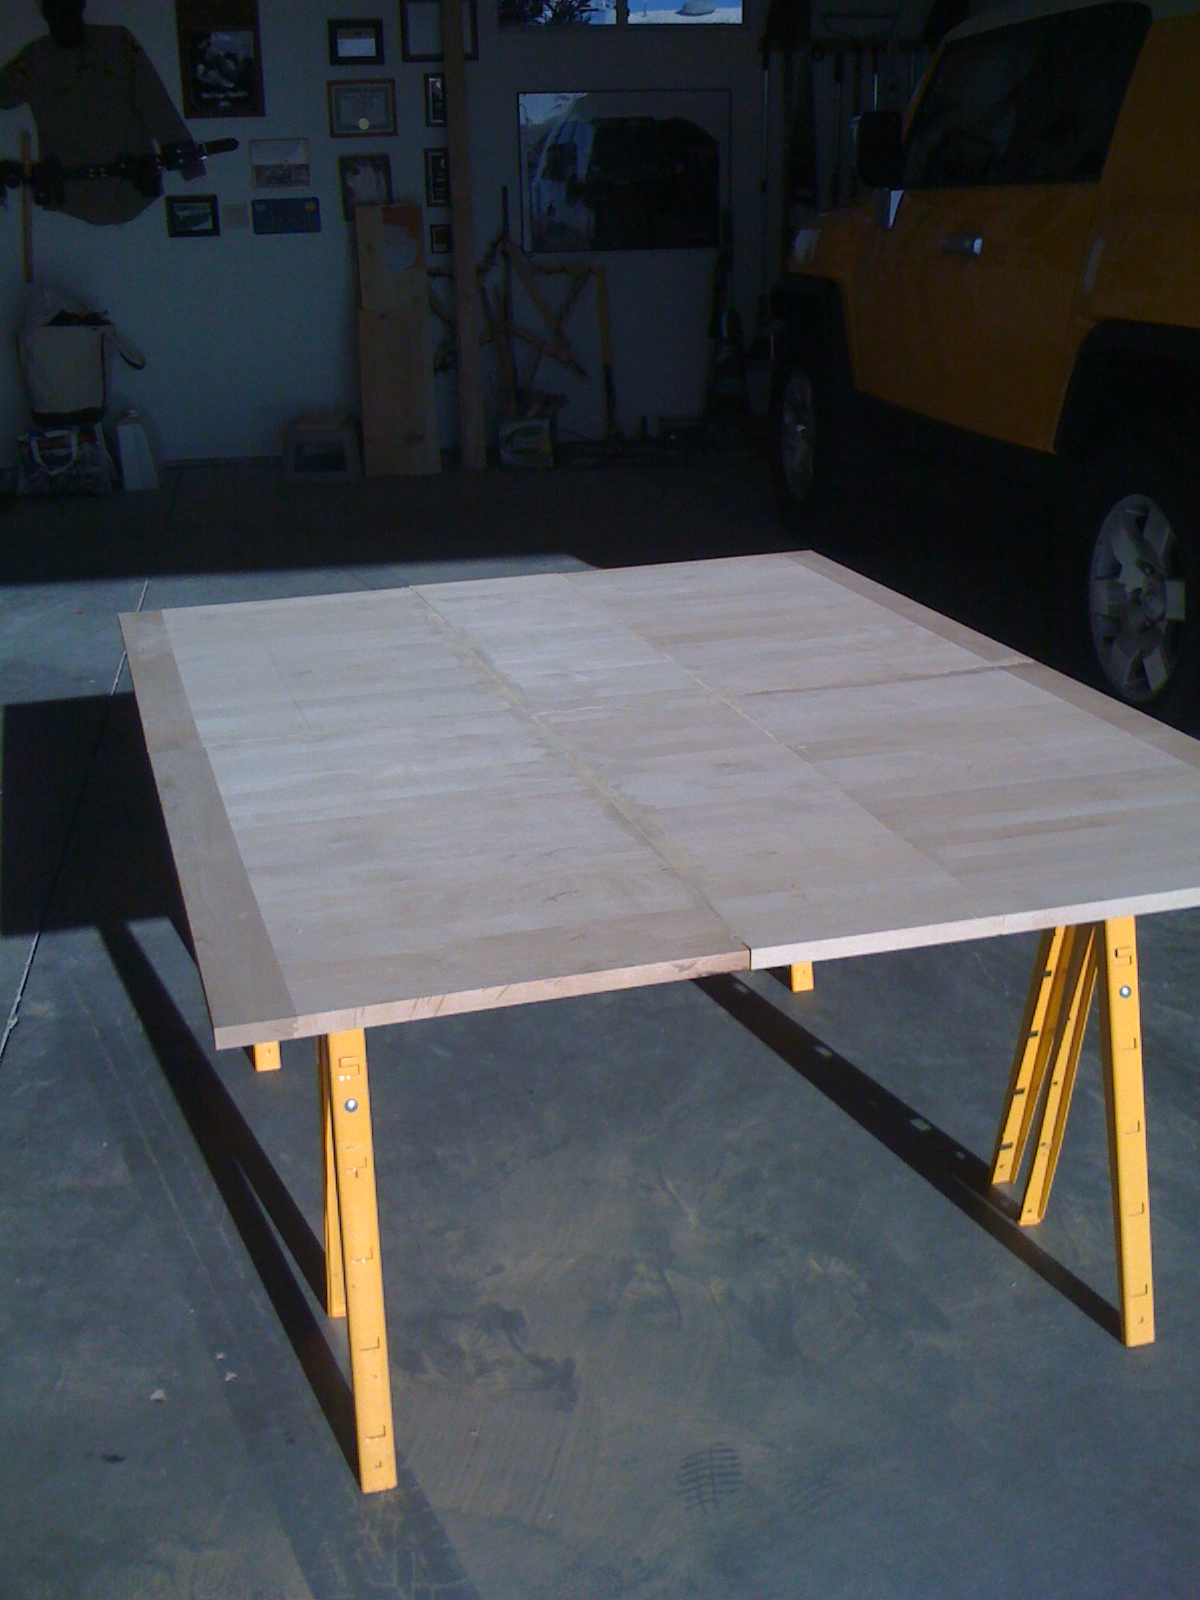
Of course a normal person might question why the slabs were such an amazing deal. A normal person might conclude that maybe something was wrong with them...like maybe they just looked square when really they were anything but.
I was so blinded by how pretty they looked, it never occurred to me that NONE of the sides were straight. Would ONE straight side really have been too much to ask?
When I ran the slabs through my table saw thinking I was making a nice fresh cut with a glueable edge, really I was mirroring the subtle bow shape from the other side. Of course I didn't discover my error until I was ready to glue the 6 pieces together to make the tabletop.
There was a lot of cussing.
Then there was a lot of wood filler.
 |
| There was a LOT of sanding. Three hours straight of it. 50, 80, 100, 220, and 660 grit using a belt sander, a palm sander and my little aching fingers. |
I called the repair man - thank God for home warranties and $55 later, we had new batteries in our thermostat (who knew they had batteries?) and new rubber washers on the heating unit. I was warm again but the butcher block top didn't do as well with the low temps. In fact, they were enough to crack the wood filler and the top looked awful.
 |
| The filler just pulled away on each side - I think I cried. |
I called a woodworking expert friend and received disappointing news...I would have to start over.
Armed with my dremel tool and my very limited dental assistant skills I proceeded to pick out the old filler as if I was cleaning out old amalgam...on the positive side I can cross that off my career wish list.
 |
| I had to wear my reading glasses to avoid drilling into the edges of the alder |
 |
| Time for more sanding...sigh. |
 |
| Dave says it makes the kitchen seem bigger. |
 |
| And all the stools fit around it - phew! |
You are freaking amazing Sarah! I want to grow up to be like you. Oh wait, I'm already a decade or so your senior. Okay, I want to grow down to be like you.
ReplyDeleteThat was quite the project! You are crazy but that is ok cause crazy is good. :) It turned out lovely. Don't you just hate painting prep though - drives me crazy especially in my house when I think the original people didn't do any paint prep ever so I am fixing a zillion rough bits and stuff. I still wish I was as good at coming up with ideas for projects out of other things. You should write a book about re-purposing items. :) I am definitely going to have to come visit sometime.
ReplyDeleteFabulous Mum! Very funny too. You do such a good job of taking the reader through the process. I feel like I was there but without having to hold up wood as you cut.... So much better!
ReplyDeleteI love the idea of "growing down"! I want to do that too :)
ReplyDeleteHaha you were always such a good sport about holding the wood Erica :)
ReplyDeleteI know what you mean about painting prep - sometimes I think about how it must have been before they invented primer...ah - the good old days!
ReplyDeleteWOW Sarah you're brilliant. Love it.
ReplyDelete